If you spend most of your day at a desk, on your phone, or behind the wheel, your body is quietly shifting out of balance. Your shoulders roll forward, your upper back gets tight, and basic things like lifting groceries, playing with your kids, or hanging from a bar feel harder than they should.
That’s where bodyweight pull exercises come in.
You don’t need a full gym or heavy weights to build a strong back, powerful grip, and better posture. With smart progressions and a bit of consistency, you can train effective pulling patterns in your living room, at a park, or even in a doorway.
In this guide, you’ll learn why pulling strength matters for longevity and performance, how to structure bodyweight pull workouts, and step‑by‑step progressions, from simple table rows all the way to pull-ups.
Why Pulling Strength Matters For Posture, Longevity, And Performance
Modern life is very “push heavy”: typing, driving, texting, pushing a mouse forward, pressing your head toward a screen. Over time, that creates muscular imbalances, tight chest and front shoulders, weak upper back and lats.
Bodyweight pull exercises directly counter that pattern.
They target your:
- Latissimus dorsi (lats) – the big back muscles that support shoulder and spine alignment.
- Mid- and lower trapezius & rhomboids – crucial for scapular (shoulder blade) stability.
- Biceps and forearms – help with pulling, lifting, and carrying.
- Grip strength – strongly linked in research to healthy aging and lower all‑cause mortality.
Studies comparing bodyweight pulling (like rows and pull-ups) to weighted pulls show similar muscle activation, often in the 60–85% range of maximal effort. That’s more than enough to build strength and muscle if you’re consistent.
Stronger pulling doesn’t just look good in a mirror:
- Posture: A stronger upper back helps gently “pull” your shoulders into a more neutral position, which can reduce neck tension and that familiar rounded‑shoulder desk posture.
- Core and balance: Bodyweight pulls, especially horizontal rows and pull-ups, demand significant core engagement, research suggests 15–30% more core activation than many machine exercises.
- Longevity & independence: Pulling strength supports your ability to climb stairs, get up from the floor, catch yourself if you slip, and stay active as you age. Improvements in back and grip strength are associated with better balance and functional capacity.
- Performance: Whether it’s recreational sports, rock climbing, swimming, or simply carrying your suitcase, a strong back and grip give you a serious edge.
In short: if you care about aging well, feeling strong, and moving with confidence, pulling strength is non‑negotiable.
Key Principles Of Effective Bodyweight Pull Training

You can absolutely build serious pulling strength with just your bodyweight, but only if you treat these movements like real training, not random reps between emails.
Here are the principles that make your bodyweight pull exercises actually work:
- Progressive overload
Your muscles adapt to the stress you give them. Over time, you need to make things slightly harder. With bodyweight pulls you can do this by:
- Changing the angle (more horizontal = harder for rows).
- Slowing down the movement (especially the lowering phase).
- Adding pauses at the top.
- Increasing total reps or sets.
- Eventually adding external load (a backpack, weight vest, or dumbbell).
- Time under tension
Hypertrophy (muscle growth) research suggests keeping your working sets in a zone where the muscle is under tension for roughly 30–60 seconds, and at an intensity of about 60–80% of your max effort.
That often looks like 8–15 controlled reps, where the last 2–3 are challenging but still in good form.
- Full range of motion
Think “long to short“ on every rep:
- At the bottom: arms almost straight, shoulders relaxed and slightly stretched.
- At the top: chest up toward your hands or bar, shoulder blades actively squeezed.
This improves strength, mobility, and joint health much more than tiny half‑reps.
- Train near (not always to) failure
To build strength and muscle, you’ll want some sets where you get close to failure, where you couldn’t do more than 1–2 perfect reps. You don’t need every set to be a grind, but 1–2 challenging sets per exercise go a long way.
- Consistency beats hero workouts
Two or three focused bodyweight pull sessions per week will outperform one random marathon session. Your joints, tendons, and nervous system all adapt better to regular practice.
Keep these principles in mind as you go through the horizontal and vertical pull variations below.
Foundational Horizontal Pull Exercises (Minimal Equipment)
Horizontal pulls are the safest, most accessible way to build your back at home. They’re easier than pull-ups but hit many of the same muscles.
Horizontal Pull Essentials: Technique And Setup
The basic idea of a horizontal row: your body is in a plank‑like position, and you pull your chest toward your hands.
General cues for all row variations:
- Keep your body in a straight line from head to heels (or knees). No sagging hips.
- Think “chest to hands“, not “chin to bar.“ Lead with your chest.
- At the top, squeeze your shoulder blades together and pause for 1 second.
- Lower slowly for 2–3 seconds, keeping control.
Now let’s go from easiest to hardest.
Beginner Variations: Table Rows, Doorway Rows, And Towel Rows
You can start horizontal pulling with almost no equipment.
1. Table rows
- Find a sturdy table that won’t tip.
- Lie under it, grab the edge with both hands, feet bent and flat on the floor.
- Pull your chest up to the table, pause, and lower.
- Make it easier by scooting your feet closer to your hips: harder by walking them farther away so your body is more horizontal.
2. Doorway rows
- Stand facing an open door, feet about hip‑width apart.
- Grab both door handles or a towel looped through them.
- Lean back, keeping your body straight, arms extended.
- Row your chest toward the door, then lower under control.
- The more you walk your feet forward (so you’re leaning back), the harder it gets.
3. Towel rows (around a post or pole)
- Wrap a strong towel around a pole, post, or railing.
- Hold one end of the towel in each hand.
- Lean back and row just like the doorway version.
These variations are friendly on the joints and great for learning how to engage your lats and mid‑back.
Aim for 3 sets of 8–12 reps, resting 60–90 seconds between sets.
Intermediate Variations: Inverted Rows And Feet-Elevated Rows
Once the beginner options feel too easy, move to more horizontal positions.
1. Inverted rows (under a bar or sturdy surface)
You’ll need a low bar, rings, or something similar (a Smith machine or playground bar works).
- Set the bar around waist height.
- Slide under it, grab with an overhand grip slightly wider than shoulders.
- Legs straight, heels on the ground, body in a rigid plank.
- Pull your chest to the bar, pause, lower for 2–3 seconds.
To make it easier, bend your knees and plant your feet closer to your hips. To make it harder, move the bar lower so your body is more horizontal.
2. Feet-elevated inverted rows
- Place your heels on a bench, box, or chair.
- Keep your shoulders under the bar and your body in a straight line.
- Row as usual.
Feet‑elevated rows make your body heavier relative to your arms, pushing you closer to the strength demands of pull-ups.
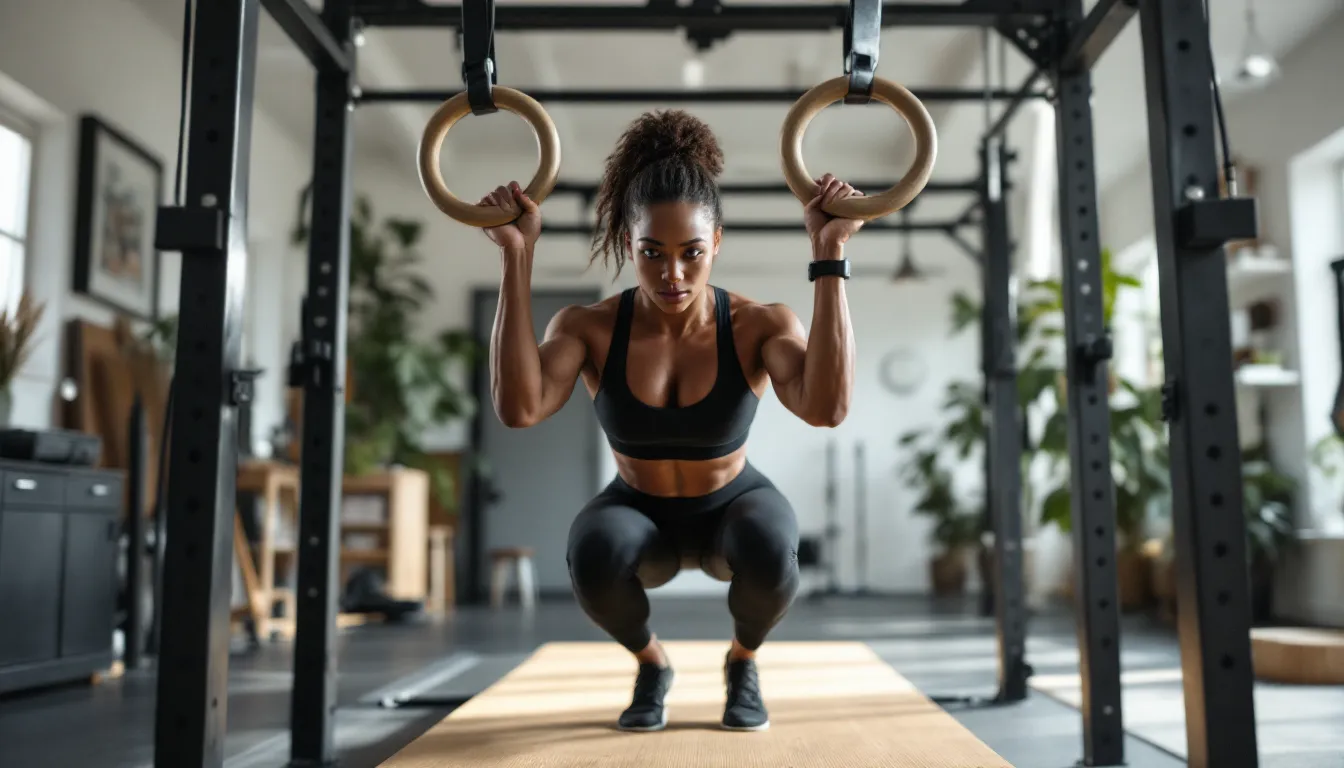
Advanced Variations: Single-Arm And Tempo Rows
When standard rows feel comfortable, you can turn things up without adding weight.
1. Single‑arm rows (bodyweight)
With a sturdy ring, TRX, or towel:
- Stand facing the anchor and hold it with one hand.
- Lean back, feet forward, free arm out for balance.
- Row your chest toward your hand, keeping your torso from twisting.
- Lower slowly.
Single‑arm work challenges your core and grip significantly.
2. Tempo rows (slow eccentrics)
No extra equipment required:
- Pull up in 1 second, pause at the top for 1–2 seconds.
- Lower for 3–5 seconds under full control.
Slowing the lowering (eccentric) phase increases time under tension and can trigger similar hypertrophy benefits to lifting heavier weights.
Use these advanced options for 2–3 sets of 6–10 challenging reps.
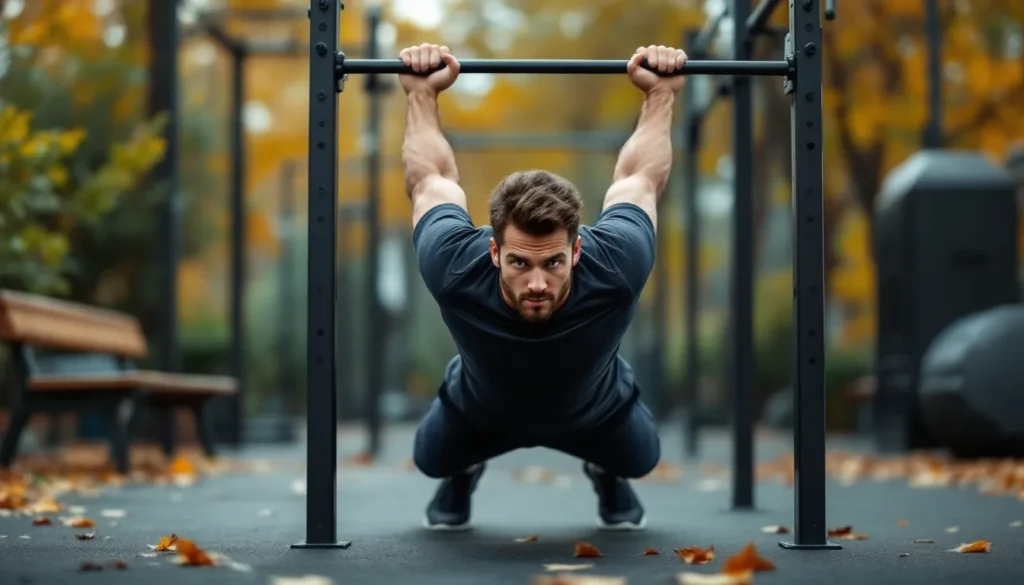
Vertical Pull Progressions Toward Your First Pull-Up
Vertical pulls, like chin-ups and pull-ups, are many people’s “white whale” of bodyweight training. They’re demanding, but you can absolutely get there with a smart progression.
Assisted Pull-Ups: Bands, Chairs, And Partner Support
If you can’t yet do an unassisted pull-up, you don’t just hang and hope. You build strength in a scaled way.
Options for assistance:
- Resistance bands: Loop a strong band over the bar, place one knee or foot in the band, and let it help you on the way up.
- Chair or box: Place a box under the bar. Use your legs just enough to help you over the sticking point.
- Partner support: A training partner can gently assist you at your mid‑back or ankles as you pull.
Cues:
- Start from a dead hang or nearly straight arms.
- Think “drive elbows down to your ribs“ instead of pulling with your hands.
- Chest lifts toward the bar, ribs not flared excessively.
Aim for 3–5 sets of 3–6 assisted reps, resting 60–90 seconds.
Eccentric (Lowering) Work To Break Through Plateaus
Research on strength training shows that eccentric (lowering) work is extremely effective for building strength, often boosting gains by around 10–15% when added to regular training.
For pull-ups, that looks like this:
- Use a chair or jump to get your chest near the bar.
- Hold the top for 1–2 seconds.
- Lower yourself slowly for 3–5 seconds until your arms are straight.
- Reset and repeat.
You can do 3–5 sets of 3–5 eccentric reps. Stop if you can’t control the descent, that’s your nervous system asking for recovery.
Eccentrics are tough on the muscles (in a good way), so ease in: once or twice weekly is enough at first.
From Chin-Ups To Wide-Grip Pull-Ups And Beyond
Different grips shift the emphasis across your back and arms.
1. Chin-ups (underhand grip)
- Palms facing you, hands shoulder‑width apart.
- More help from the biceps, often easier for beginners.
2. Neutral‑grip pull-ups
- Palms facing each other (using parallel bars or neutral handles).
- Typically most comfortable on wrists and shoulders.
3. Standard and wide‑grip pull-ups
- Overhand grip, hands slightly wider than shoulder‑width.
- Wide‑grip increases demand on the lats and upper back.
Progression idea:
- Build your first unassisted chin-up with bands + eccentrics.
- Once you can do 3–5 clean chin-ups, begin mixing in neutral‑grip pull-ups.
- Gradually widen your grip over time as strength and shoulder stability improve.
You don’t need fancy variations. A steady diet of controlled reps, full range of motion, and consistent practice will get you there.
Core And Grip Work That Supercharges Your Pulling Strength
Your back can only pull as hard as your core and grip allow. Supporting these areas will accelerate your progress on every bodyweight pull exercise.
Core Stability Drills That Reinforce Pull Patterns
Research shows that planks and related isometric core drills can reach 60–80% muscle activation, which is plenty for strength and endurance gains.
Try weaving these into your routine:
1. Front plank
- Elbows under shoulders, body in a straight line.
- Think “ribs down, glutes tight.”
- Hold for 20–40 seconds, 2–3 rounds.
2. Side plank
- Support your body on one forearm and the side of one foot.
- Keep hips stacked and lifted.
- Hold 15–30 seconds per side.
3. L‑sit progressions (on the floor, bars, or yoga blocks)
- Start seated with hands beside your hips, knees bent.
- Push down through your hands to lift your hips slightly.
- Progress by straightening your legs into a full L‑position over time.
These drills teach you to maintain a solid “pillar” so your pulling power doesn’t leak through a soft midsection.
Grip Training For Everyday Strength And Longevity
Grip strength is more than a gym metric. Large studies have linked stronger grip to better overall health and reduced risk of disability as you age.
Simple, effective options:
- Dead hangs: Hang from a pull-up bar, shoulders slightly active (not jammed up by your ears), for 10–30 seconds at a time.
- Towel hangs or towel rows: Loop a towel over a bar or door anchor and hang or row while gripping the towel ends. This massively challenges your forearms and hand strength.
- Farmer holds (if you have weights): Hold heavy objects (dumbbells, kettlebells, or loaded grocery bags) at your sides and stand tall for 20–40 seconds.
Add 1–2 of these drills to the end of your pulling sessions to see steady improvements in both grip and pulling performance.
Sample Weekly Routines For Busy Schedules
You don’t need hour‑long workouts to build a strong back. Short, focused sessions, done consistently, can fit into even the busiest week.
10–15 Minute Micro-Sessions You Can Do At Home Or The Office
Here are two simple routines using mostly bodyweight pull exercises.
Routine A (Beginner‑friendly, 3x per week)
- Doorway or table rows – 3 sets of 8–12 reps
- Assisted pull-up holds or eccentrics – 3 sets of 3–5 reps
- Front plank – 2 sets of 20–30 seconds
- Dead hangs – 2 sets of 10–20 seconds
This can realistically be done in 10–15 minutes. Rest 30–60 seconds between sets.
Routine B (Intermediate, 2–3x per week)
- Inverted rows or feet‑elevated rows – 3 sets of 8–10 reps
- Assisted or unassisted chin-ups – 3 sets of 4–8 reps
- Side plank – 2 sets of 15–30 seconds per side
- Towel rows or hangs – 2 sets of 20–30 seconds
You can alternate Routine A and B based on your current level, or stick with one until it feels comfortable, then progress.
Balancing Push And Pull For A Resilient Upper Body
To keep your shoulders healthy and posture balanced, try to match your pulling volume with pushing.
A simple approach:
- For every set of rows or pull-ups you do, perform a set of push‑ups or another push variation at some point that week.
- Example 2‑day split:
- Day 1: Rows + push‑ups + planks.
- Day 2: Pull-up progressions + overhead presses (if you have weights) + side planks.
This push‑pull balance supports shoulder stability, reduces overuse risk, and keeps your upper body strong in all directions.
Common Mistakes And How To Progress Safely Over Time
Bodyweight pull exercises are safe for most people, but like any training, the details matter.
Avoiding Overuse: Recovery, Mobility, And Deload Weeks
Common issues:
- Doing too much, too soon: Jumping straight into high‑volume pull-ups or heavy eccentric work can irritate elbows and shoulders.
- Always training to failure: Constantly grinding to your last possible rep can stall progress and drain your nervous system.
Smart guidelines:
- Start with 2 sessions per week, leaving at least one rest or light day between heavy pulling days.
- Use a deload week every 4–6 weeks: cut your sets and reps by about 30–50%, focus on easy technique work and mobility.
- Add gentle shoulder mobility: arm circles, wall slides, and band pull‑aparts (if you have a band) to keep joints happy.
If you feel sharp pain, especially in the front of the shoulder or inside the elbow, back off, shorten your range of motion, or rest a few days and reassess.
When And How To Add External Load Safely
Eventually, your bodyweight alone may not be enough to keep driving progress, especially on easier variations.
You can add load safely by:
- Wearing a backpack with books or water bottles during rows or pull-ups.
- Using a weight belt or holding a dumbbell between your feet for advanced pull-ups (once you can do at least 8–10 clean reps).
- Holding a dumbbell or kettlebell during inverted rows.
Before adding external load, ask yourself:
- Can you control full range of motion without swinging?
- Are your last 2–3 reps tough but not ugly?
- Is your shoulder and elbow health solid, no recurring pain?
If yes, start light and progress in small jumps, not big leaps. Your tendons will thank you.